You may wish to include tables in your manuscript. Unlike figures, tables that are created directly within Microsoft Word can be embedded throughout your manuscript. In other words, they do not need to be saved as a separate file with their placement indicated by insert tags.
If you do include tables, we ask that you do not create them manually by using tab spacing or creating columns and rows with text boxes, lines, or shapes. Instead, use Microsoft Word’s built-in Table feature.
To learn how, follow these simple steps to incorporate tables in your manuscript.
Inserting Tables
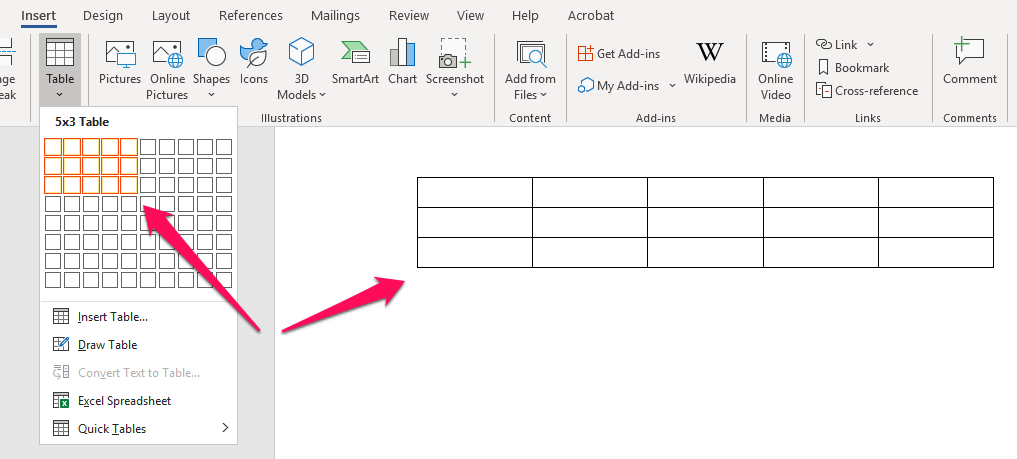
Place your cursor in the text where you would like to insert a table. Go to the Insert tab and click on the dropdown arrow under Table.

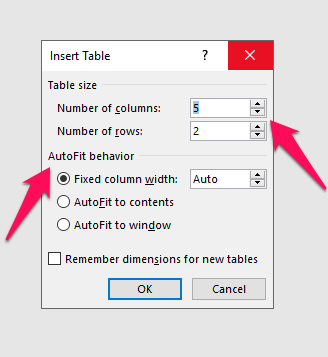
There, you can either select your table dimensions by hovering over the grid to highlight the number of rows and columns you wish to include, or by selecting Insert Table.
If you use the grid, the table will simultaneously appear on the page in your manuscript where your cursor is placed.

If you select Insert Table, you will be prompted to enter the number of rows and columns you wish to include and to select the AutoFit behavior. We recommend leaving the AutoFit behavior as Fixed Column Width.

Now you should have a simple table on your page that you can populate and customize.
Tips:
- Be sure to number and title tables by the chapter or section in which they will appear (e.g. Table 1.1, 1.2, 1.3, 2.1, etc.). This helps to keep them organized.
- When you include any kind of table in your text, also include a corresponding in-text parenthetical reference. This way, your readers have a clear understanding of which sentence corresponds to the table you’ve inserted in the text.
- Note: If you can’t find a logical insertion point for a table reference, ask yourself what value the table adds to the book.
- If your table depicts third-party data or information, be sure to include a citation with the table, just as you would cite any other source in your manuscript.


