The following snapshots provide illustrated steps to walk you through the recording process. More information is readily available on the web.
First, click the Slide Show tab in the ribbon at the top of the PowerPoint menu.

The following snapshots provide illustrated steps to walk you through the recording process. More information is readily available on the web.
First, click the Slide Show tab in the ribbon at the top of the PowerPoint menu.

Click Record Slide Show.

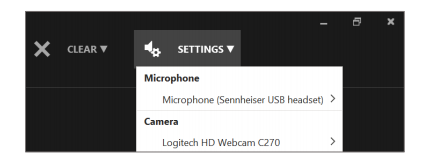
Click Settings at the top-right of the screen.
Select the microphone you wish to use for recording. Enabling a camera will place a webcam video feed in the lower-right corner of your presentation.

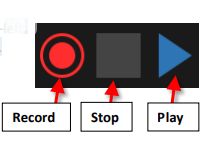
When you are ready to record, click the Record button in the upper-left corner. There will be a countdown from three, then recording will begin. You can stop or pause recording at any time.
You can use arrow keys to advance through the slides. Recording will continue as you advance.
Be sure to leave 1-2 seconds of silence at the beginning and end of the narration for each slide.
Please note that narration will not be recorded during animations and slide transitions, so plan for these breaks in narration accordingly.
You can click the Stop button when you are finished with each slide. This allows you time to prepare for recording on the next slide. Click the Record button again when you wish to continue recording.
Recording times for the current slide, as well as the total recording time, are shown in the bottom-left corner of the screen. Click the Play button to listen to the recorded narration for a slide. Click Clear to delete the recording for the current slide or all slides.

Be sure to listen to at least one slide recording to verify its quality. Check that each slide has narration and timing recorded. Click the View tab, then click Slide Sorter.

Each slide should have a speaker icon in the lower-right corner and a time indicating the length of the recording for that slide.