Record the video
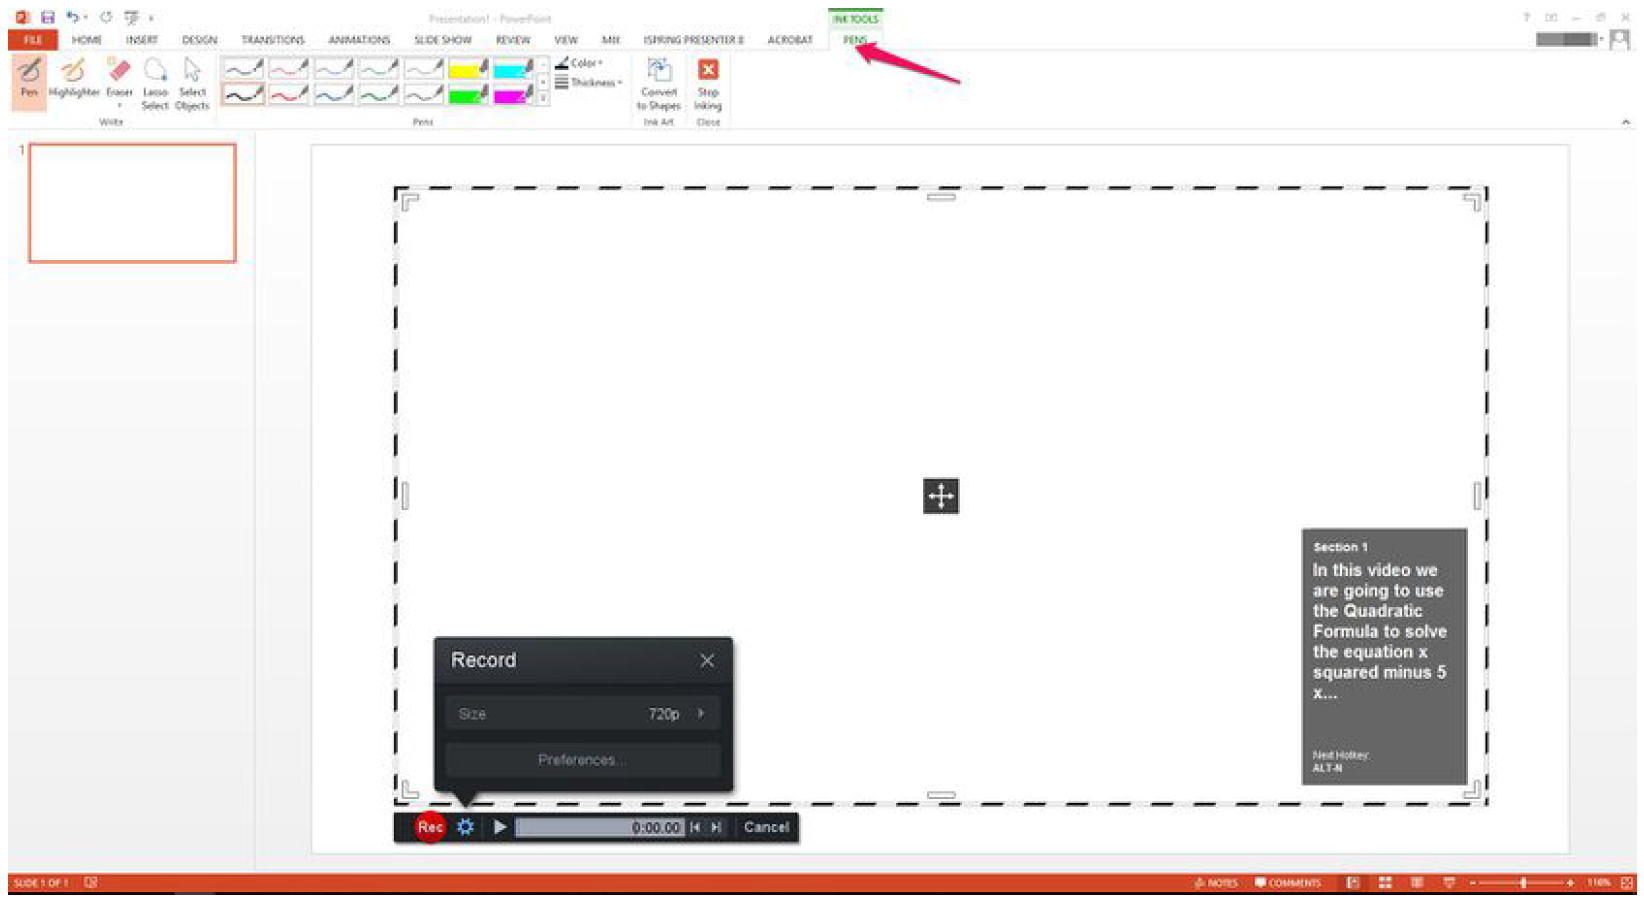
Once all audio segments have been recorded, you can move on to record the video. To prepare for the video recording, open the program in which you plan to record. If you plan to create live annotations, a blank PowerPoint presentation or Word document can serve as your blank canvas.
It is important to practice your presentation before you start recording. If you will write out an equation, practice solving it so you’re aware of how much space you need.
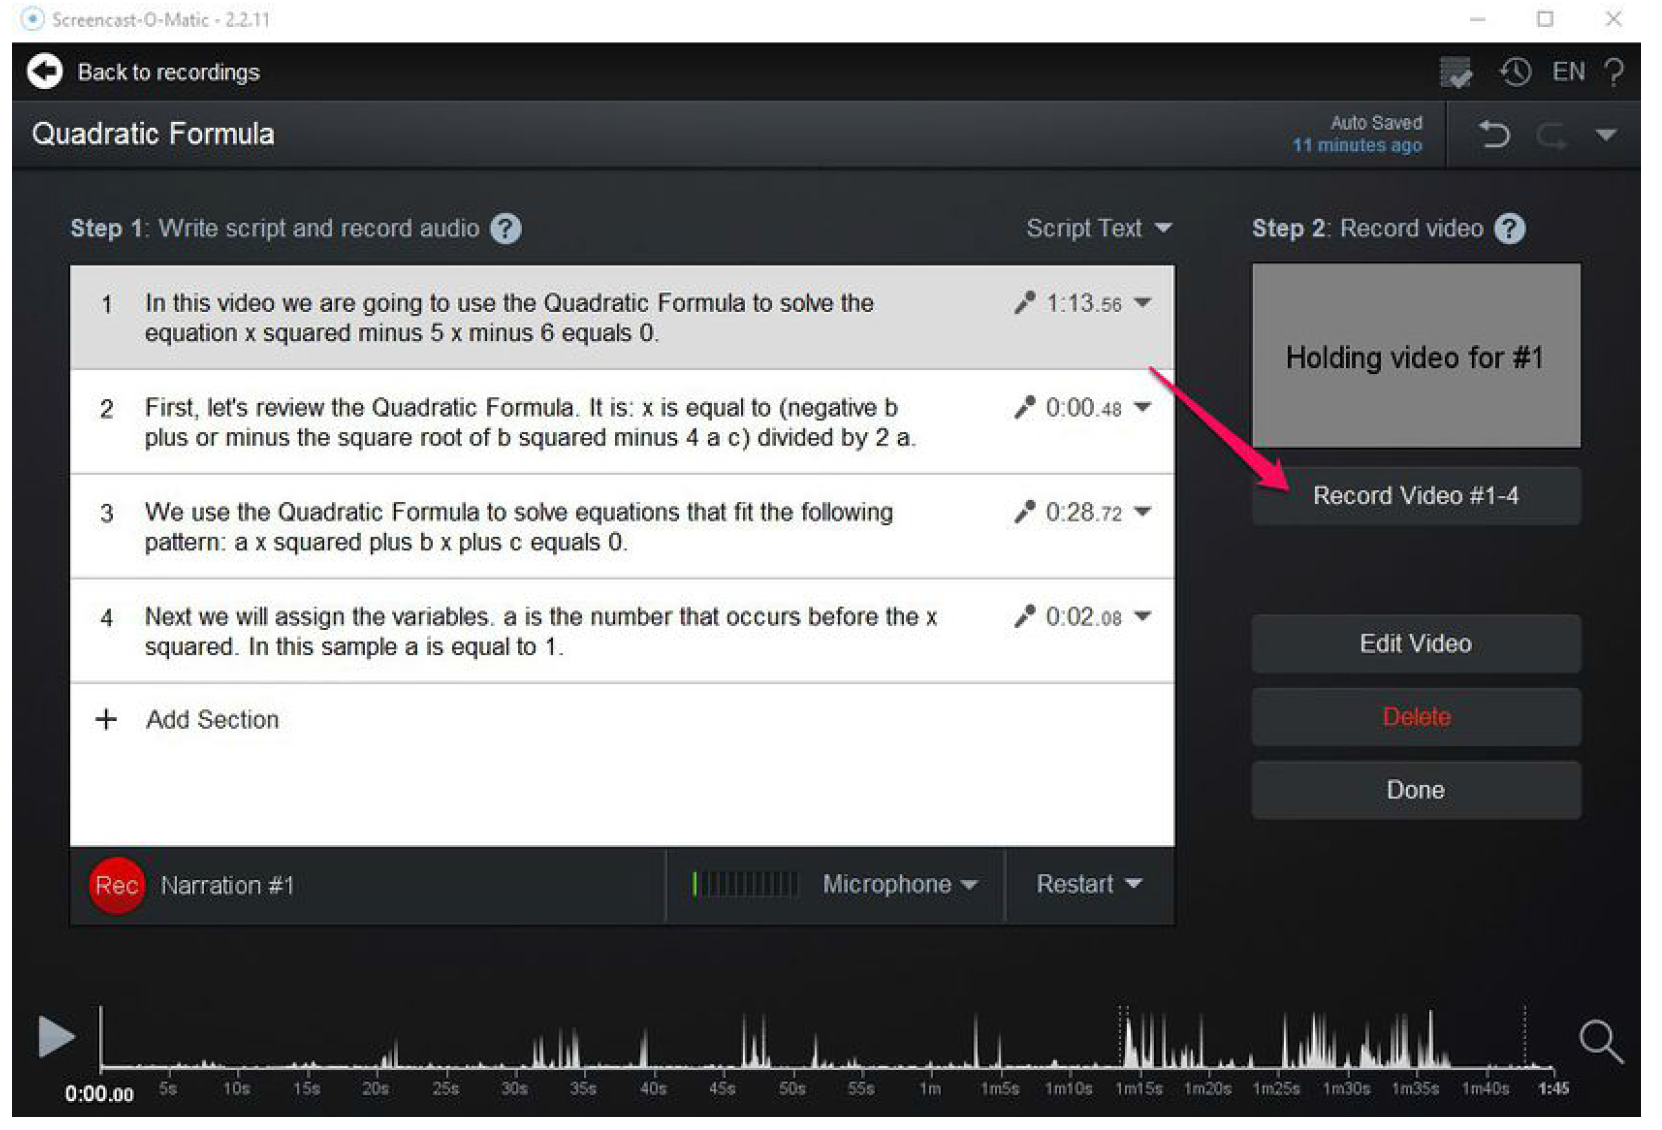
Return to the ScreenPal software and select the Record Video button.
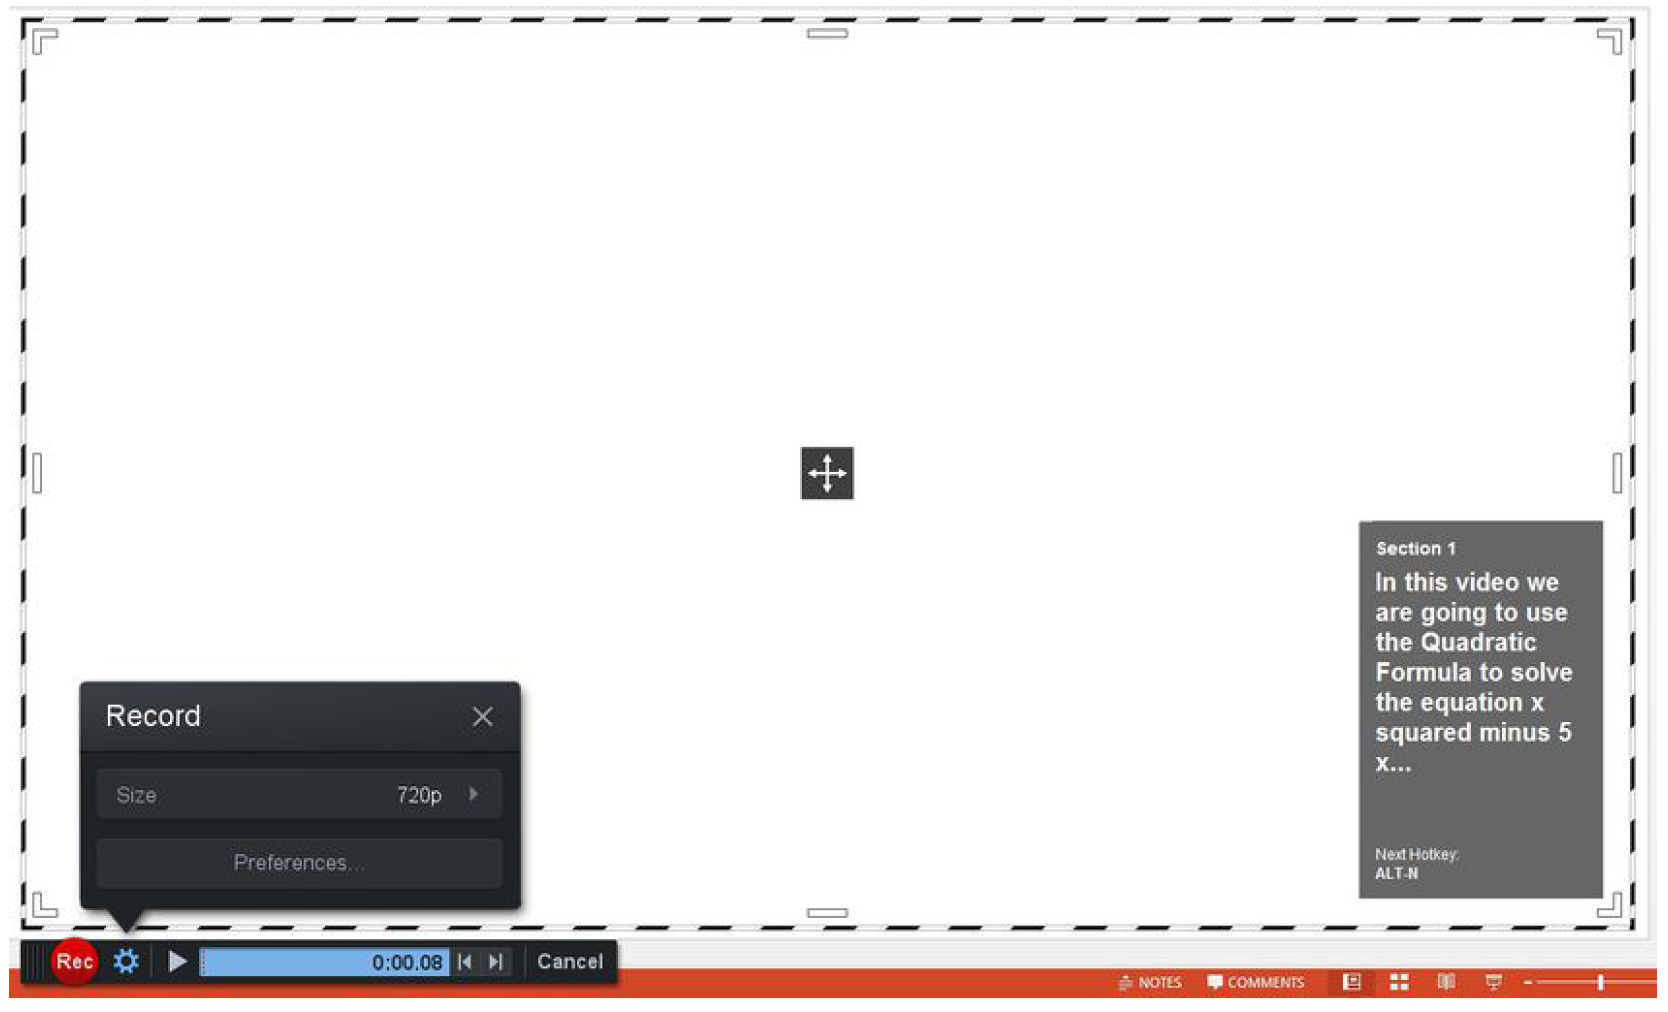
This will create a black and white frame. Click on the cog wheel next to the red record button and select a size. We recommend using the 720 size. However, if you need to use a different size for your project, please be consistent and use the same setting for all video recordings.
Position the black and white frame over the screen or within the program you will record. Adjust the size of the frame as needed.
If you plan to record live annotations, ensure that the pen tool is activated and properly configured. This screenshot shows the pen configuration options within PowerPoint.
We recommend using the pen option in PowerPoint or Word because it typically generates a smoother writing experience. However, there are some advanced annotation features available within the ScreenPal software. If you want to learn more about these features, please watch these ScreenPal tutorial videos.
ScreenPal has several hotkeys and other shortcuts. These are not mandatory to use but may be helpful while creating your recordings. If you are interested in using the hotkeys, read about them on ScreenPal’s support portal.
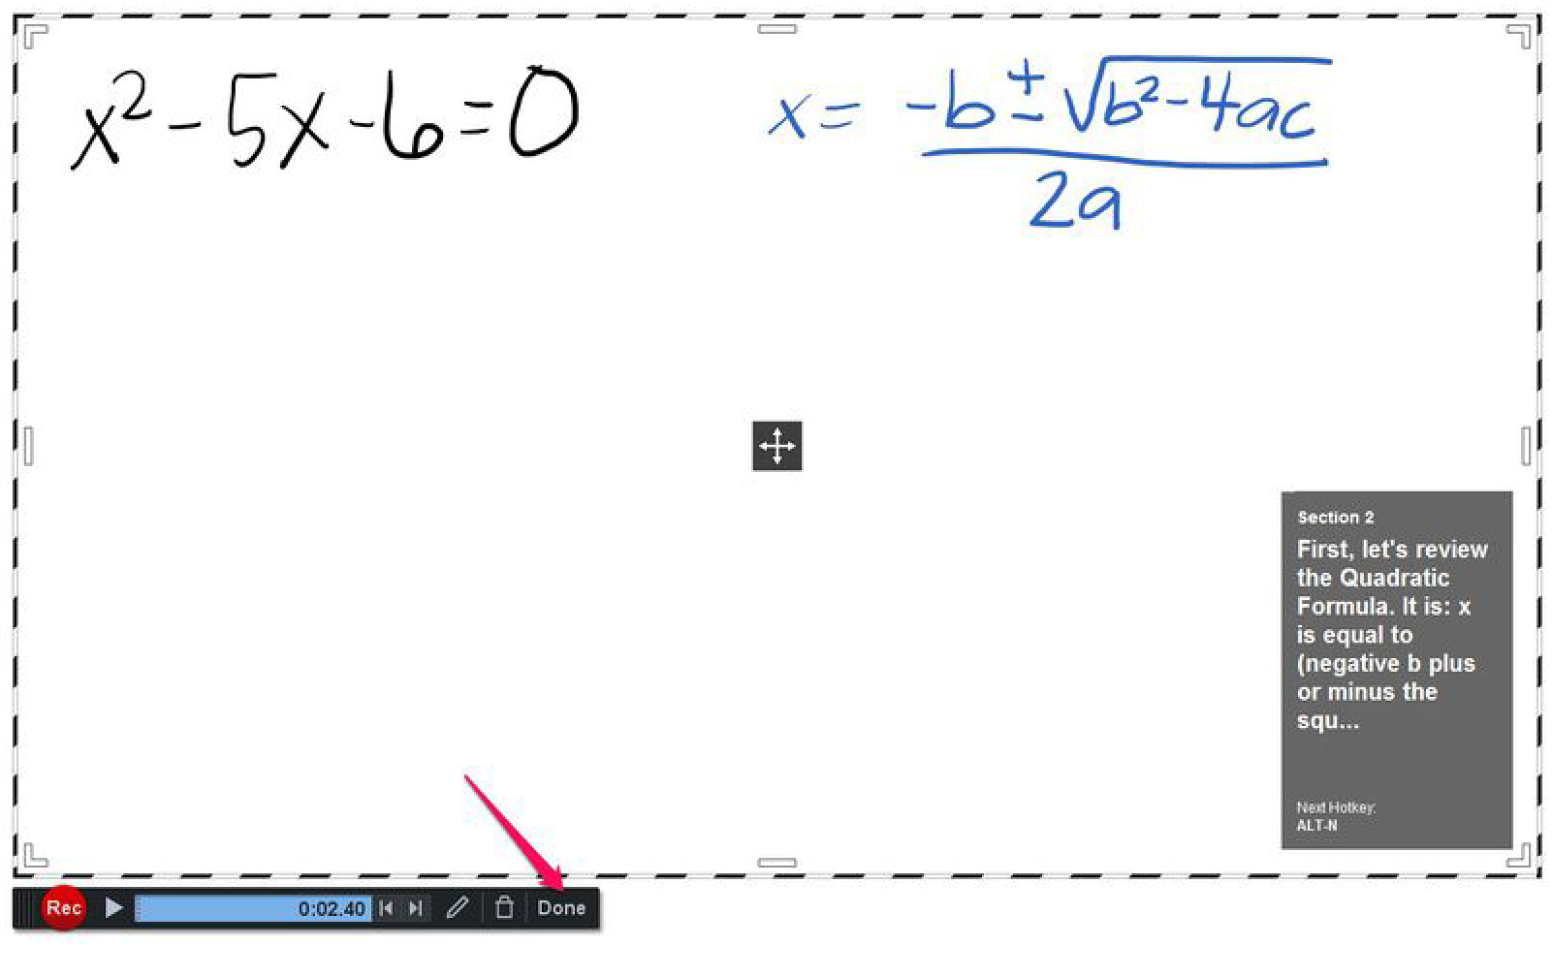
Select the red Rec button to begin recording the video.
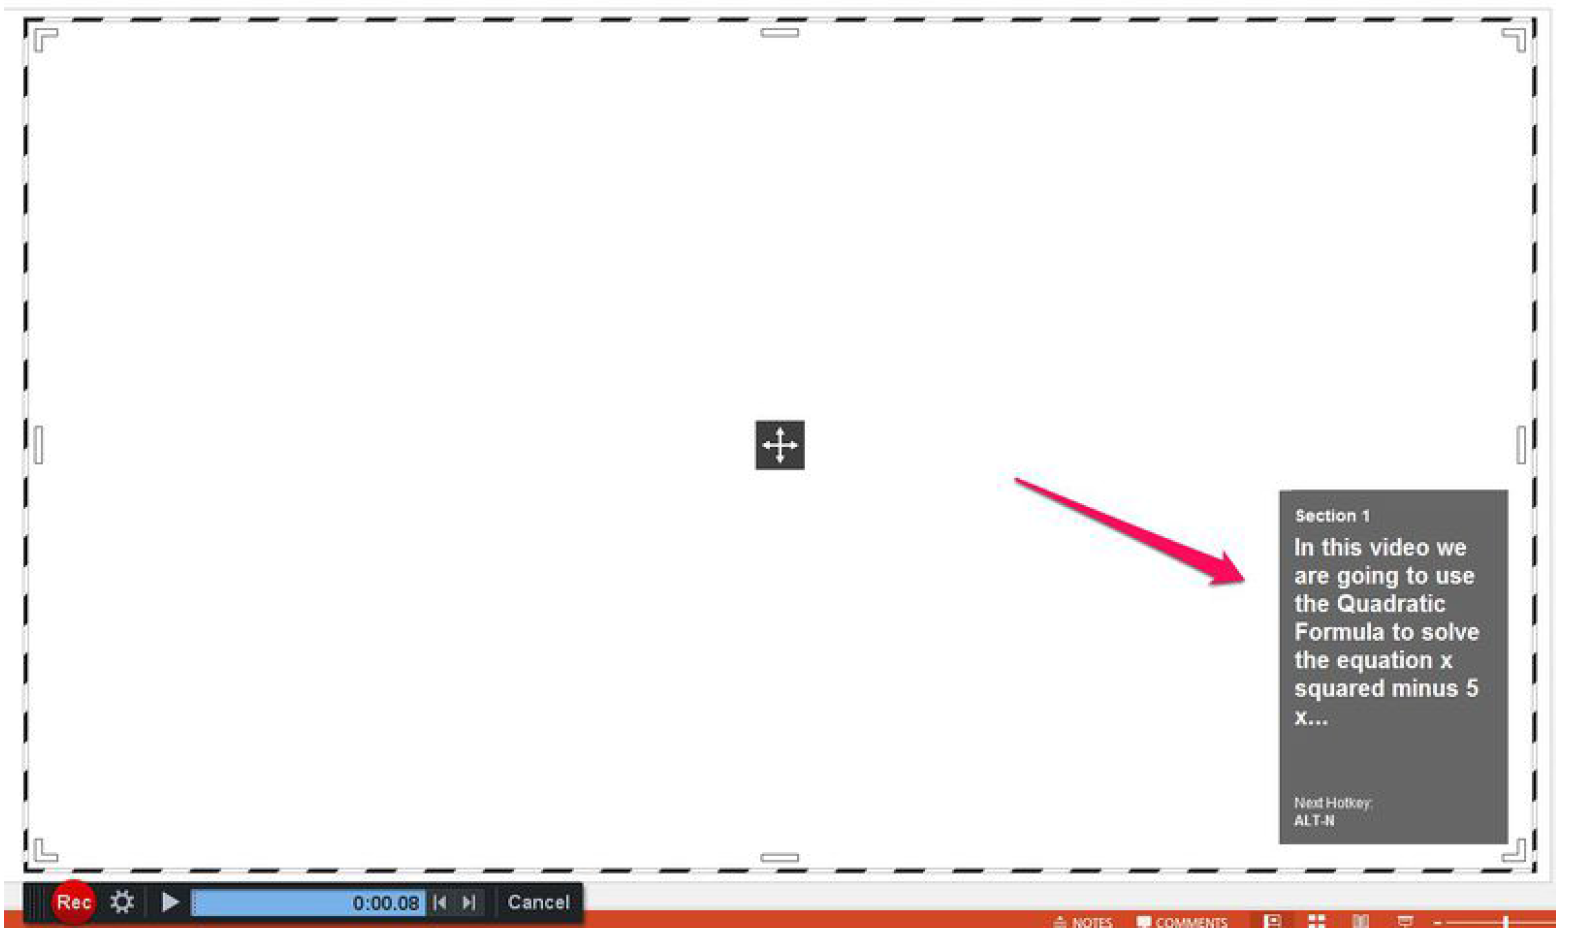
You will hear the previously recorded audio playing while you record the video. You will also see a grey box on the lower right side of the screen with the text of the recording. This grey box is visible to you during the video recording but will not be present in the final video.
After recording the video for a segment, select the blue pause button to take a break and reset your screen, if needed, before moving to the next recording. If you are ready to move directly to the next segment, select the Next button.
When you have finished, select Done.
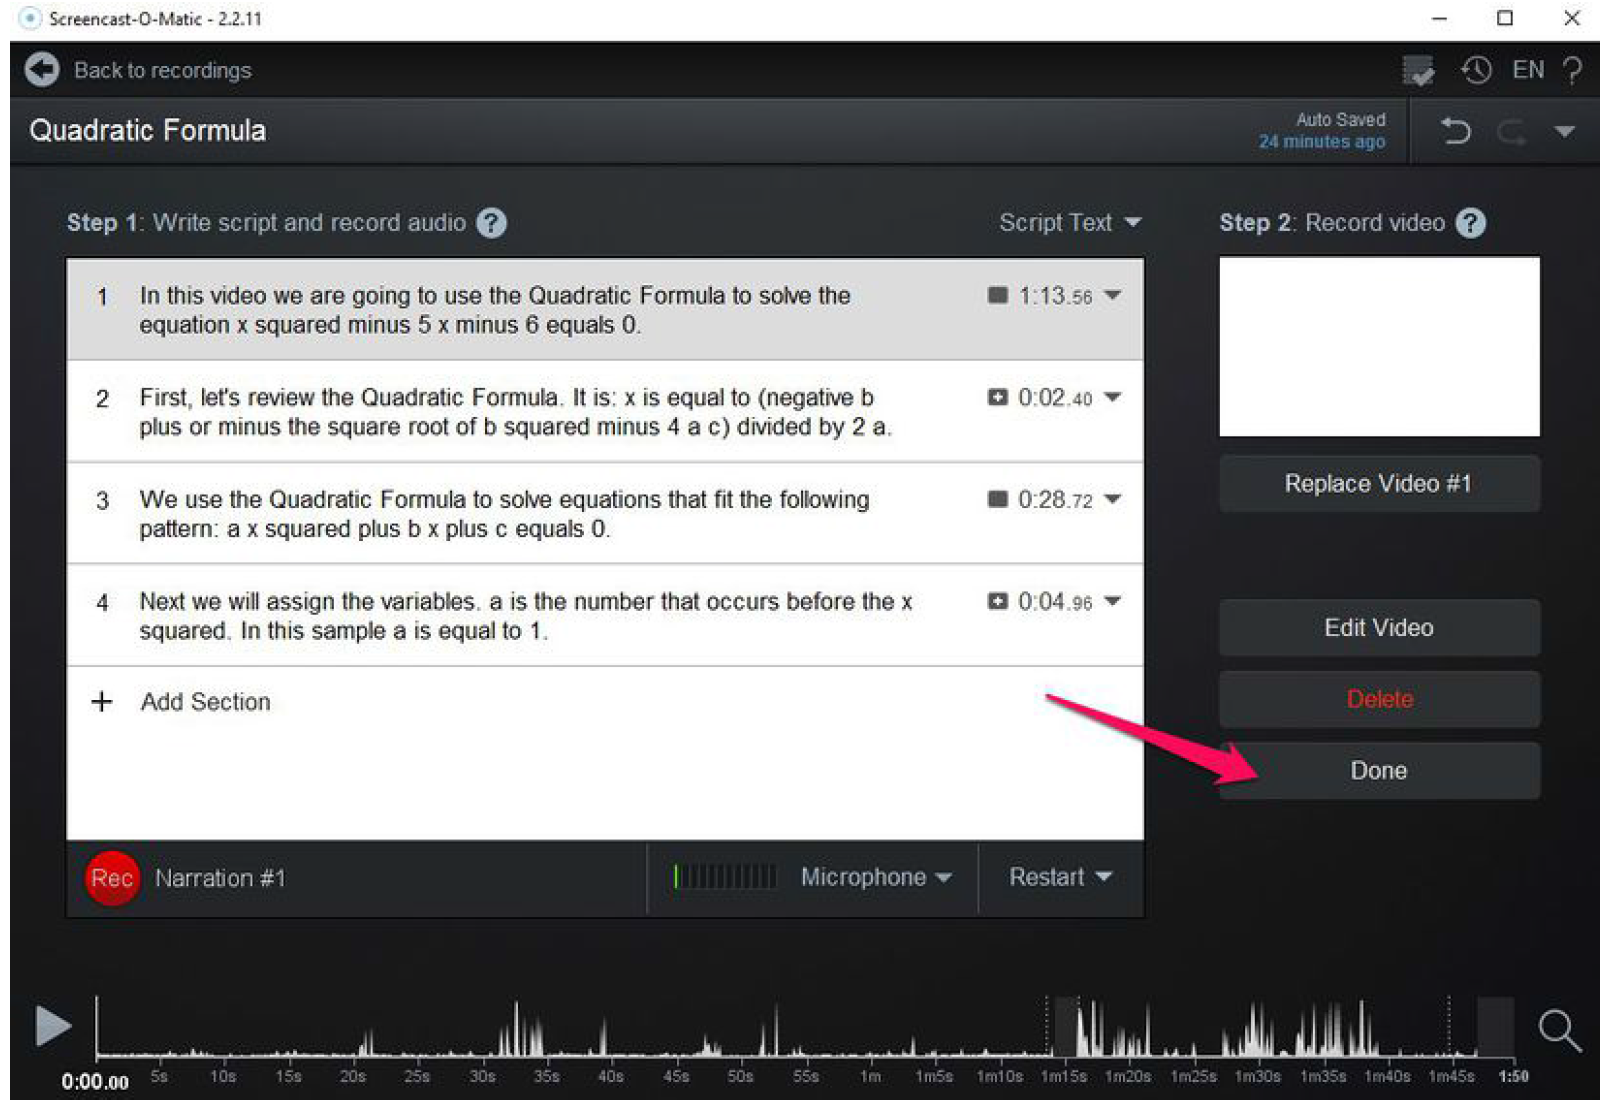
Review the project and re-record any audio or video segments as needed.
When you are satisfied with the project, select Done on the homescreen.